How I Create Cloud-Init Based VMs on Proxmox
Imagine that you have a requirement to spawn virtual machines quickly and efficiently, provision them using Ansible or Terraform, with no manual steps, no logging in to run a few commands. You simply clone the golden base image and boot your VM, point your provisioning tool at it, kick back, relax, and watch the magic happen. Sounds good, right? This way you can begin treating your machines like cattle (in a good way) - experiment, develop side projects in full isolation (via Remote-SSH), and have a truly repeatable bootstrap process. This is all possible, and I’ll document it here, mostly for my future self.
What is cloud-init?
Per cloud-init.io:
Cloud images are operating system templates and every instance starts out as an identical clone of every other instance. It is the user data that gives every cloud instance its personality and cloud-init is the tool that applies user data to your instances automatically.
In other words, it’s a run-once process at first boot that accepts custom configuration to prepare your VM. You can ensure certain packages are installed (requires network), ensure a user with a specific SSH key is created, set the locale, hostname, etc.
Why use virt-customize?
virt-customize is a tool that allows you to modify the disk contents of your image offline. It simulates the process of taking your hard drive out, plugging it into another computer, and mounting the filesystem to perform fixes, package installations, file deletions, and such.
Why am I talking about this? In my case, I need every VM to start with the qemu-guest-agent available. This allows the Proxmox UI to show certain stats of the VM, most importantly the DHCP assigned IP address, which is purely for convenience.
We could achieve this in one of the following ways:
cloud-initwith custom user data: Instructcloud-initto installqemu-guest-agentupon first boot. This keeps the VM template generic and lean but requires a custom userdata snippet (package installation isn’t directly configurable via the Proxmox UI’s cloud-init tab).- Manual VM preparation: Create a VM, boot it, install packages manually, shut down, and convert to a template. This is often recommended in guides but is problematic. You generally want to avoid booting your template image at all because you don’t want SSH host keys generated (all VMs based on this template would prompt SSH warnings due to reused keys) or any traces of user activity like shell history. You can clean these up, but it’s best to avoid creating them in the first place.
The third way, you guessed it, is to use virt-customize to modify your golden template image completely offline. Let’s try this way, shall we?
Creating the template
I’m using the latest Ubuntu LTS server images for my VMs. Pick the one you like from cloud-images.ubuntu.com. Alternatively, Debian also provides their own cloud images.
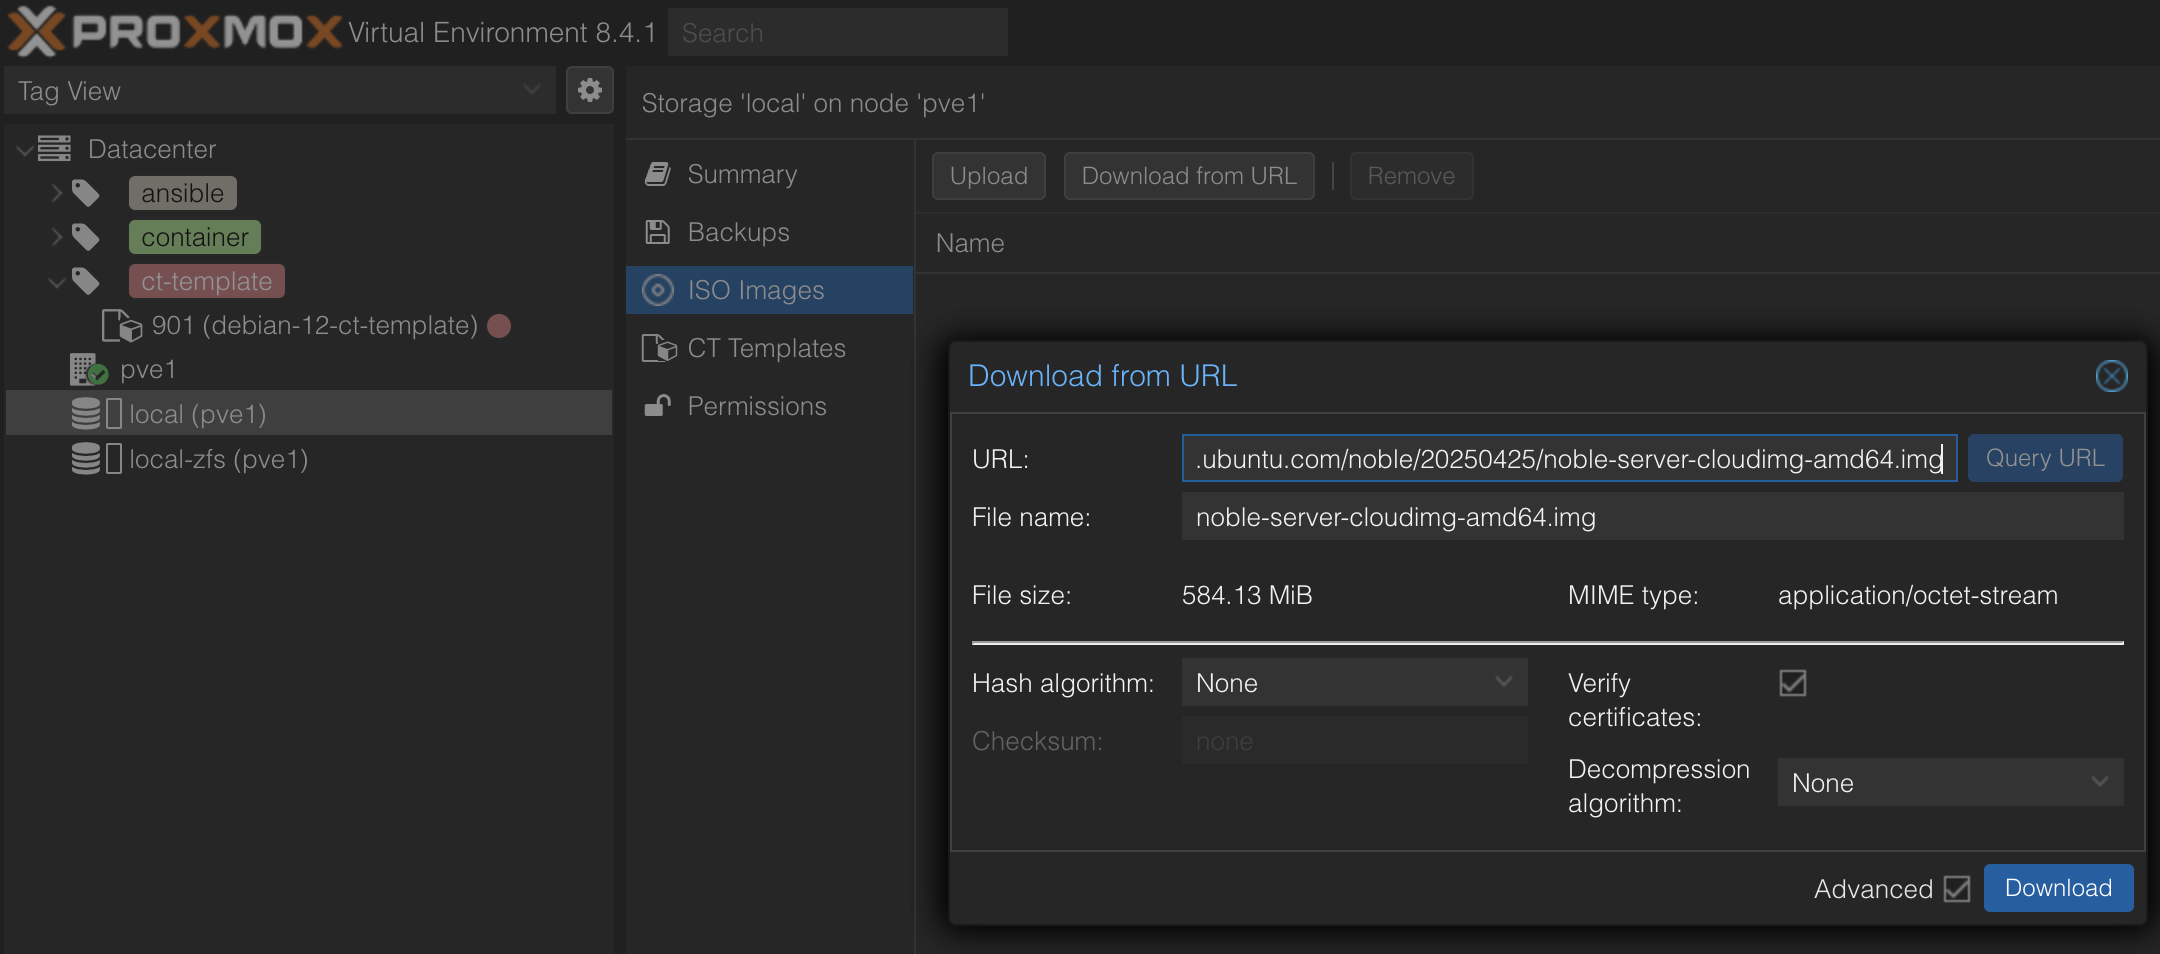
Download the image to your Proxmox host. In my case, the image ended up at /var/lib/vz/template/iso/noble-server-cloudimg-amd64.img.
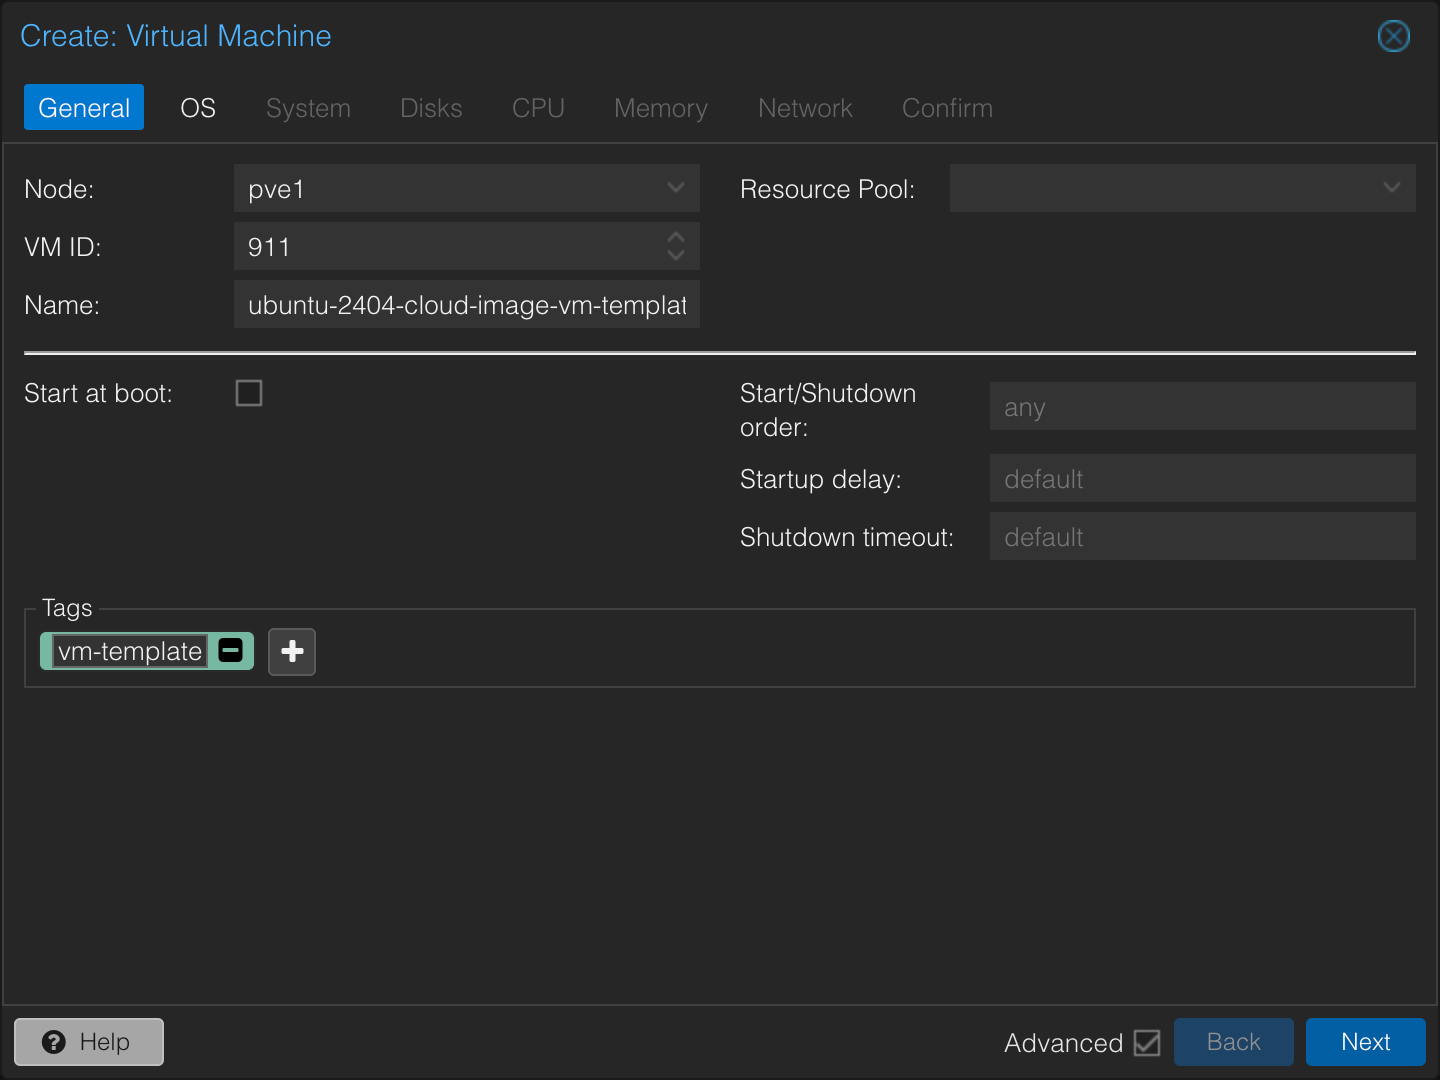
In the PVE UI, click Create VM at the top right. Give it an ID in the range you want for templates and apply any tags (useful for Ansible inventories). I’m reserving the VMID range 900+ for templates, specifically 911 for this Ubuntu VM template. Do not check Start at boot for the template itself.
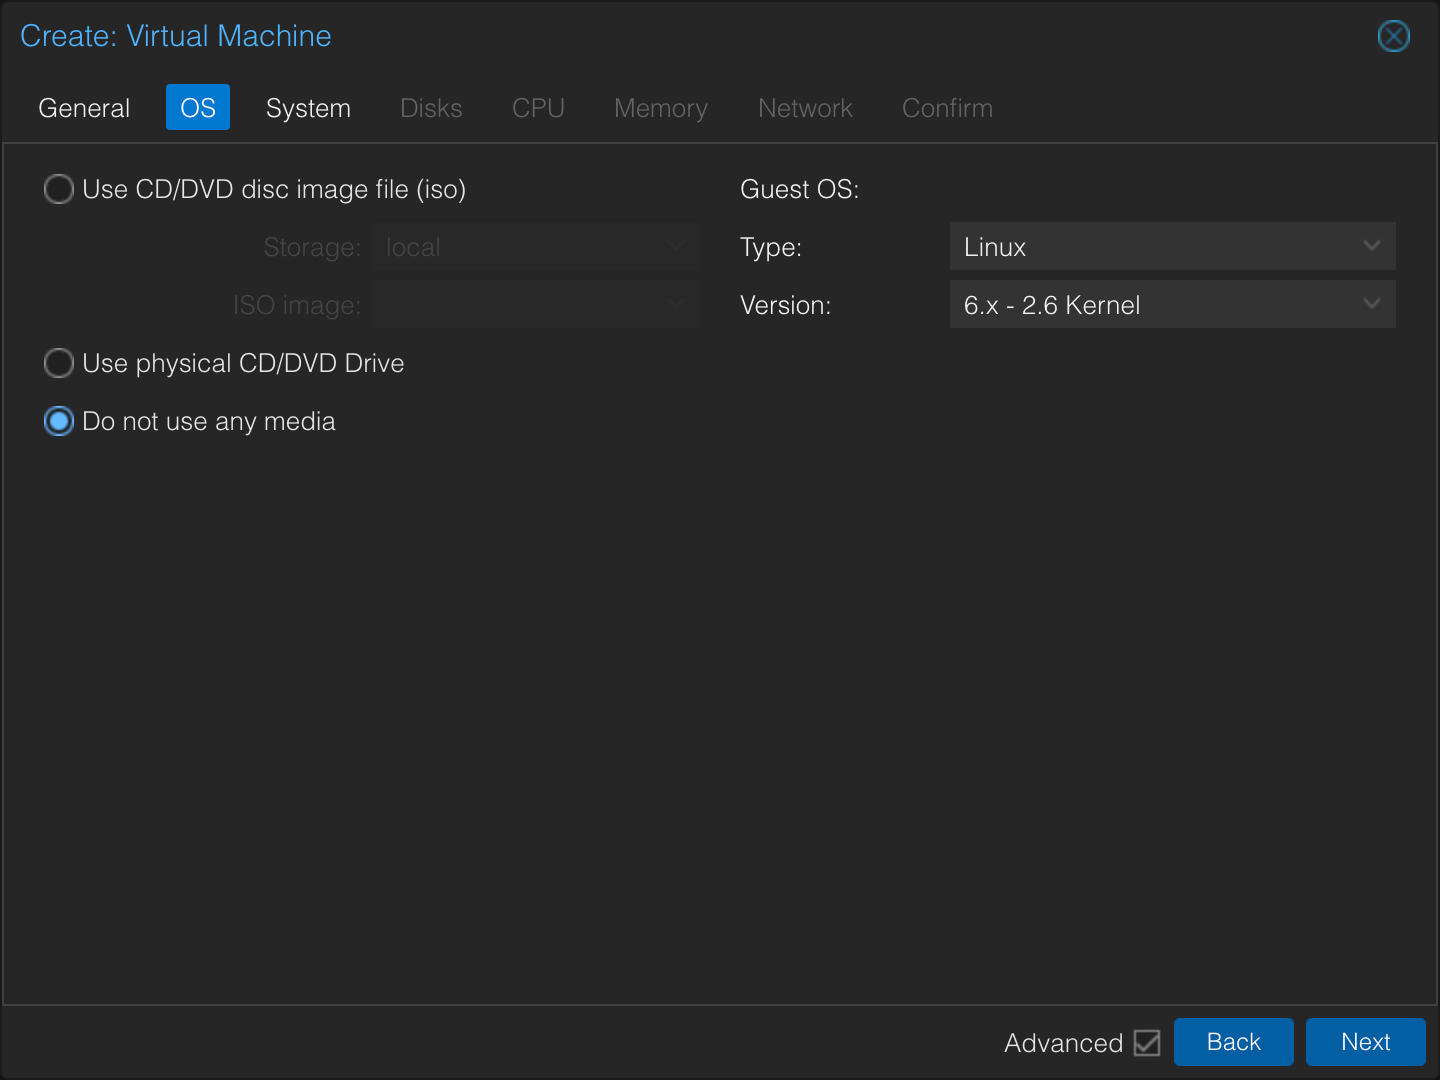
In the OS screen, select Do not use any media.
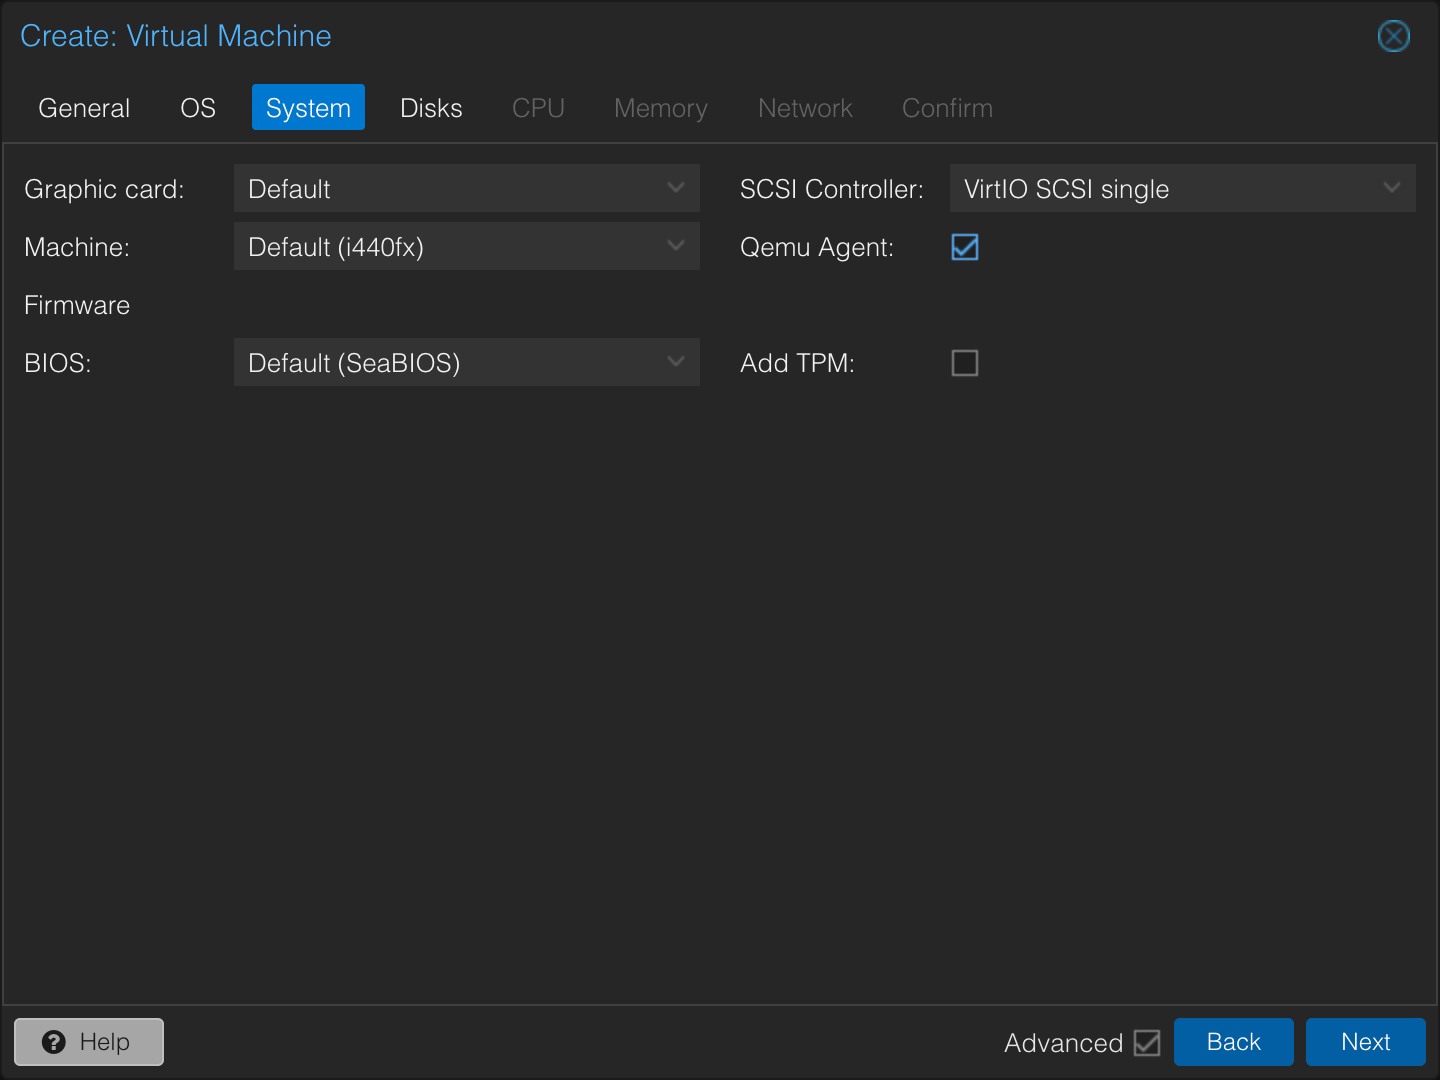
In the System screen, check the Qemu Agent checkbox. Note that this does not install the agent within the guest; it merely instructs Proxmox to try communicating with the guest using the agent protocol.
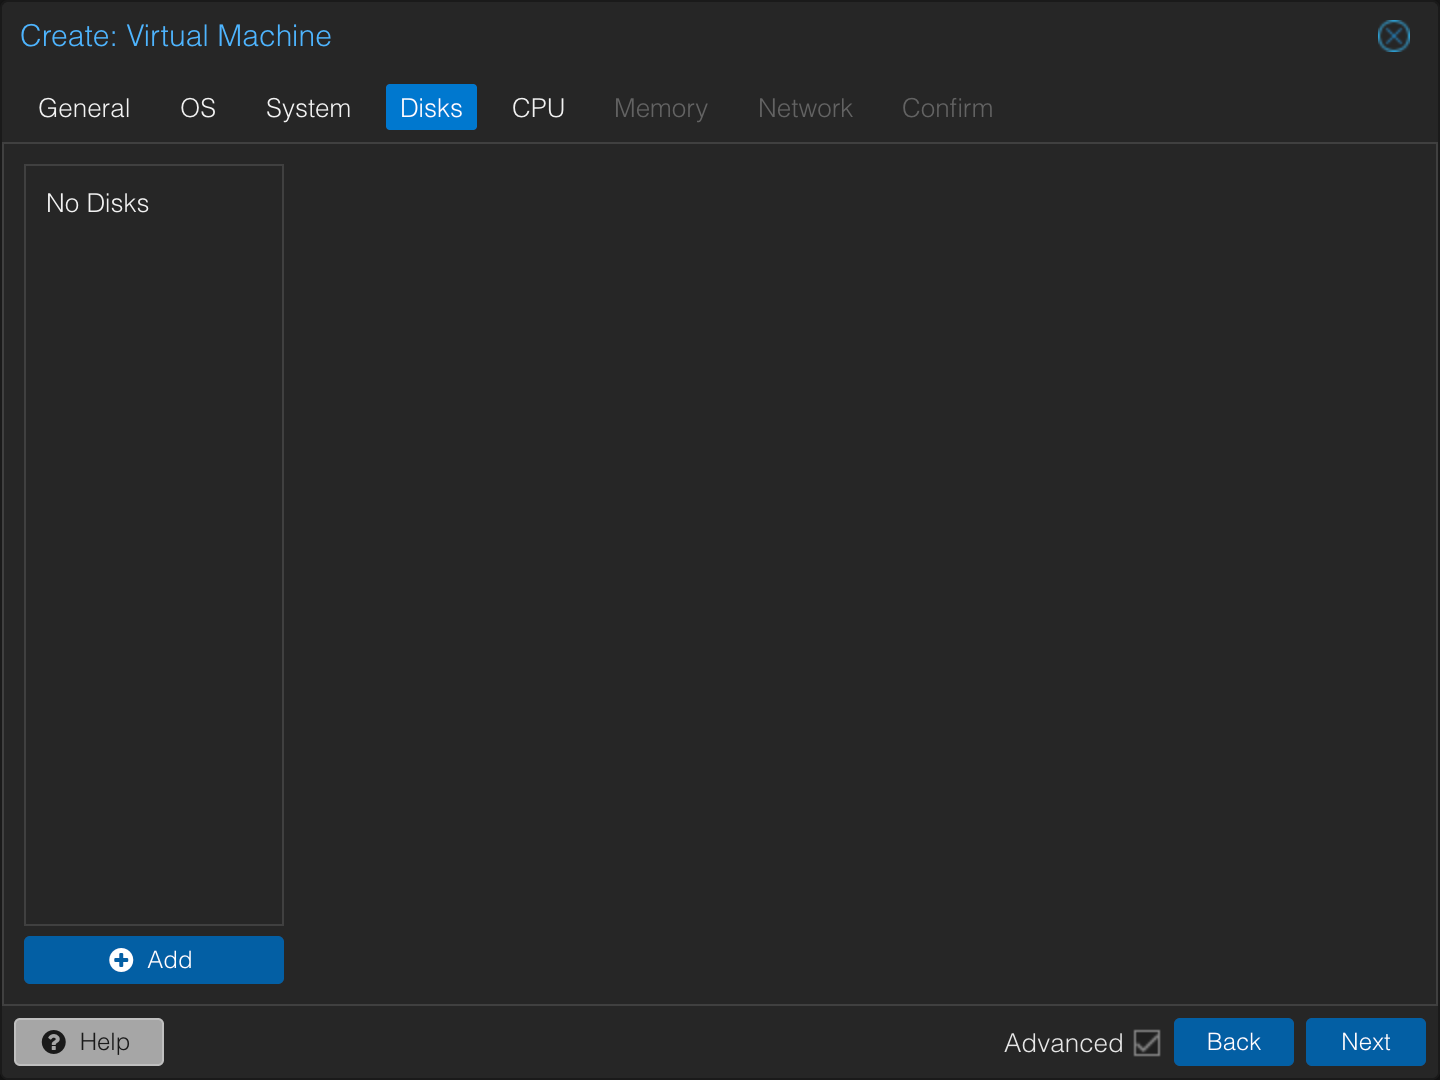
In the Disks tab, detach and remove the default disk (e.g., scsi0). We’ll be importing the cloud image disk later.
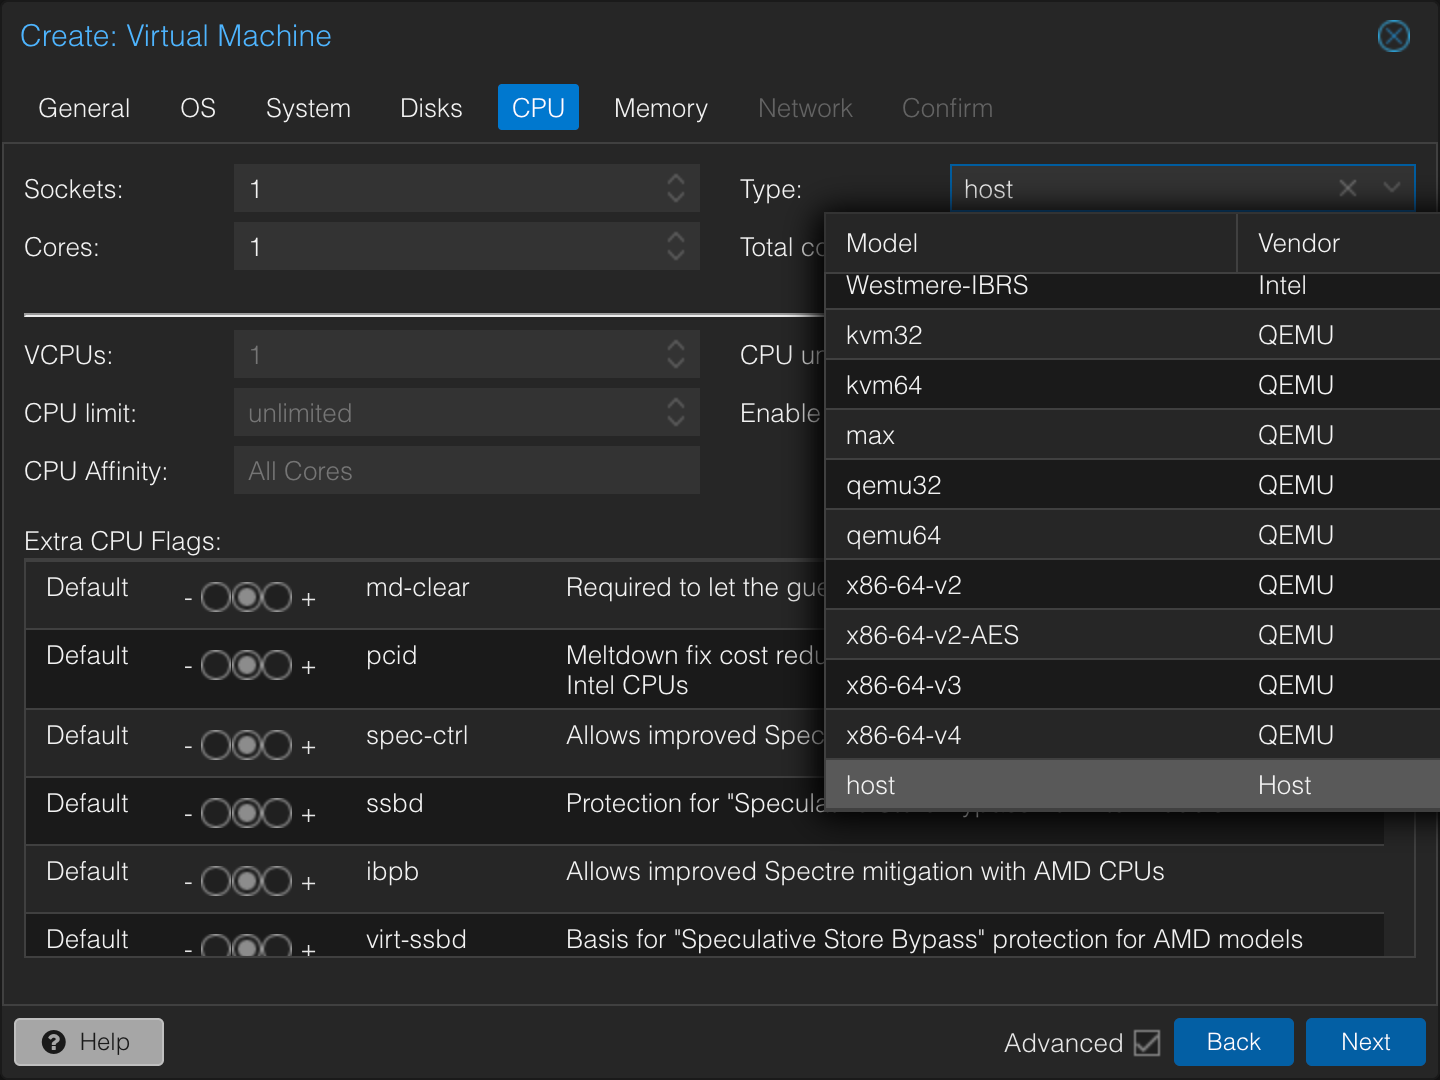
For CPU and Memory, you have options. If you know all VMs based on this template will be uniform, you can set those resources here. I prefer to customize these settings when cloning, so the minimal 1 core and 2048MB of memory are fine for the template. I make sure to select the CPU type as host. This exposes the underlying host CPU directly to the VM, ensuring instruction set compatibility and better performance than emulated CPU types. The downside is reduced portability if you need to migrate the VM to a Proxmox node with a significantly different CPU. This isn’t a concern for my setup, so host it is!
Review the settings on the Confirm screen.
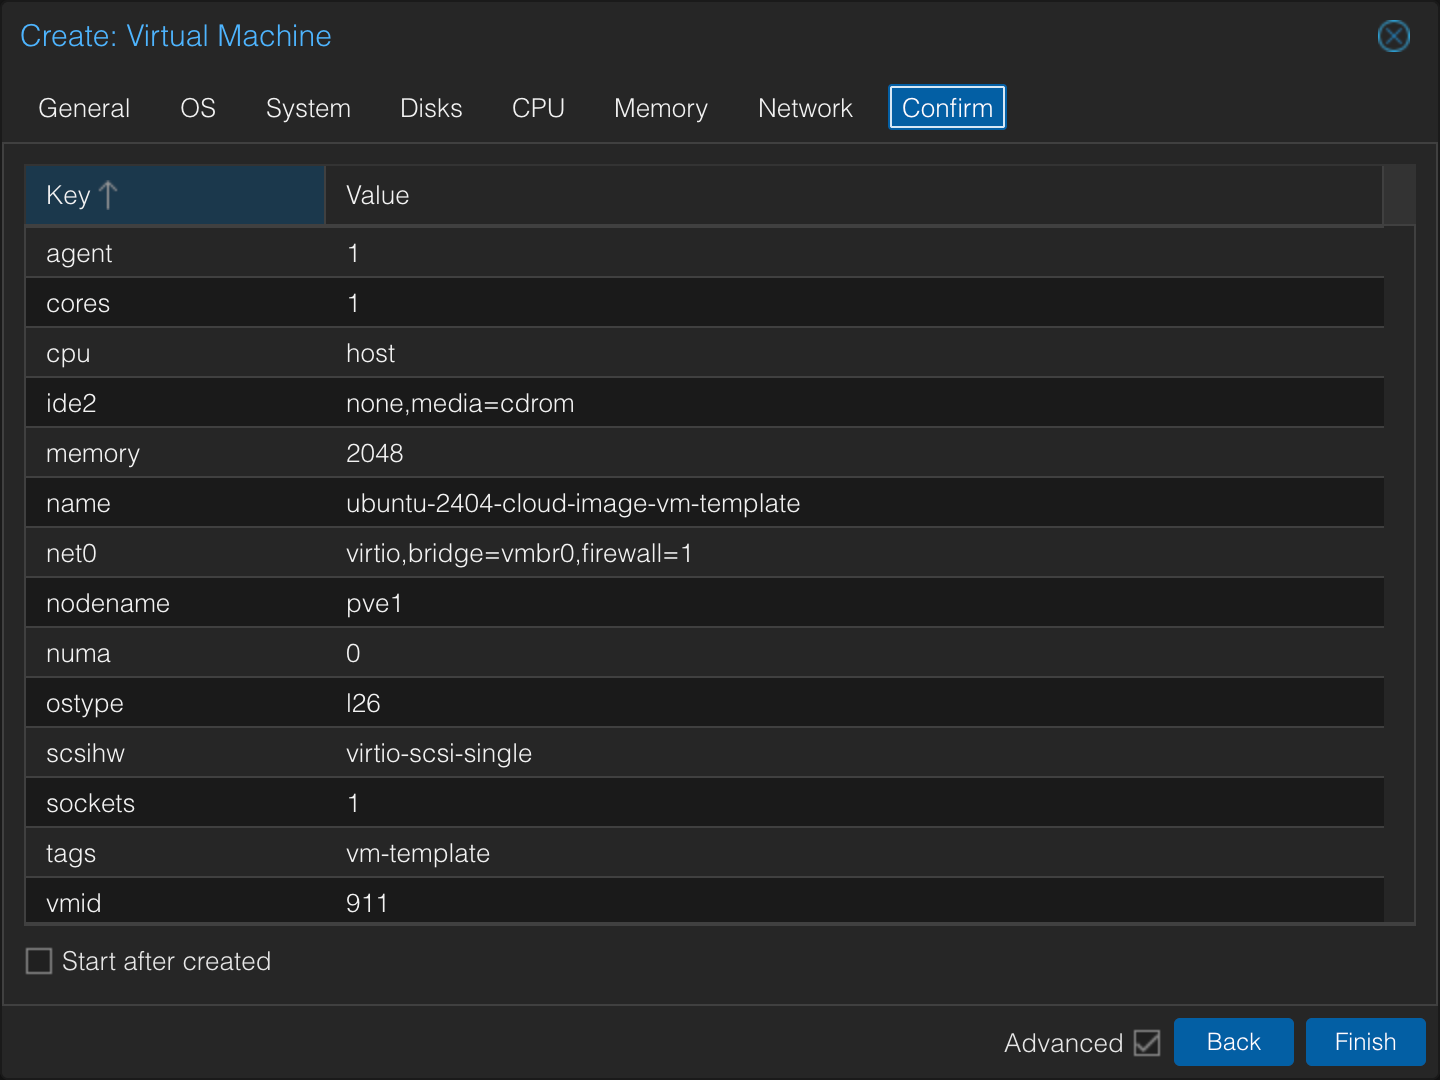
Click Finish. Now, SSH to your PVE node. First, install the necessary tools if you haven’t already:
apt-get update
apt-get install libguestfs-tools
Next, use virt-customize to modify the downloaded cloud image. This command will:
- Update package lists inside the image (
--update). - Install the QEMU guest agent (
--install qemu-guest-agent). - Clean apt cache and remove unused packages (
apt-get clean,apt-get autoremove). - Clean cloud-init logs and seeding details (
cloud-init clean). - Remove potentially generated SSH host keys (
rm -f /etc/ssh/ssh_host_*). - Reset the machine-id (
truncate,rm,ln). - Remove root’s bash history (
rm -f /root/.bash_history).
IMAGE_PATH="/var/lib/vz/template/iso/noble-server-cloudimg-amd64.img"

virt-customize \
    -a "$IMAGE_PATH" \
    --update \
    --install qemu-guest-agent \
    --run-command 'apt-get clean && apt-get autoremove -y' \
    --run-command 'cloud-init clean --logs --seed' \
    --run-command 'rm -f /etc/ssh/ssh_host_*' \
    --run-command 'truncate -s 0 /etc/machine-id && rm -f /var/lib/dbus/machine-id && ln -s /etc/machine-id /var/lib/dbus/machine-id' \
    --run-command 'rm -f /root/.bash_history'
Import the modified disk image into the template VM (using VMID 911 here) onto your desired storage (e.g., local-zfs). This will attach it as an unused disk.
TEMPLATE_VMID=911
STORAGE="local-zfs"
IMAGE_PATH="/var/lib/vz/template/iso/noble-server-cloudimg-amd64.img"

qm importdisk "$TEMPLATE_VMID" "$IMAGE_PATH" "$STORAGE"
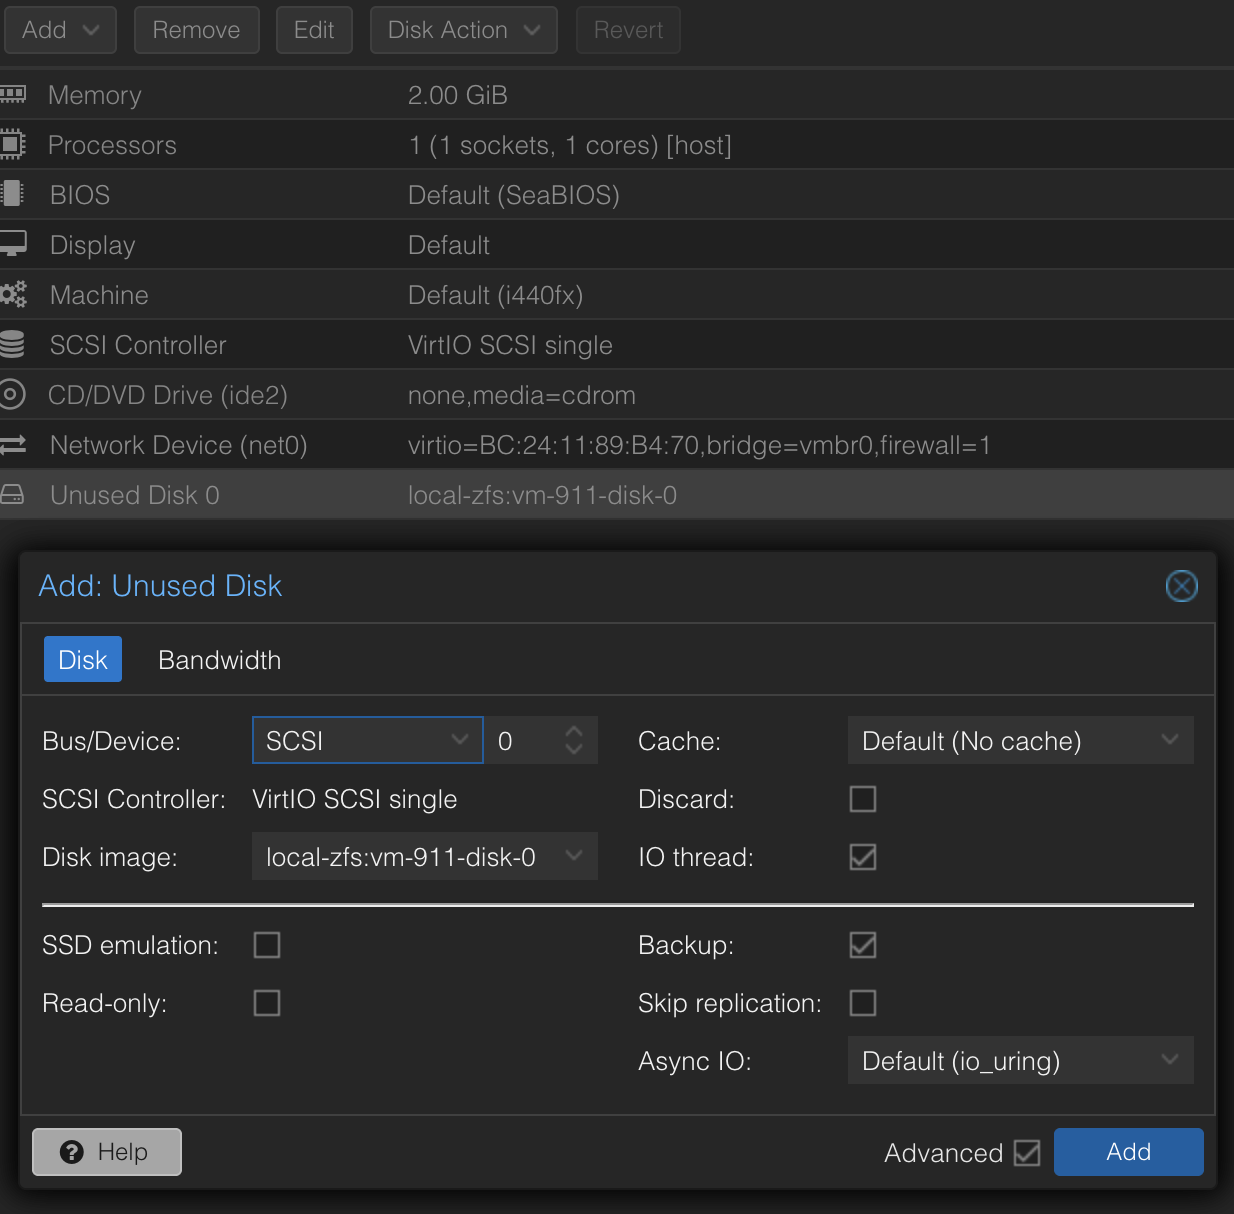
Back in the Proxmox UI, navigate to your template VM (911), go to the Hardware tab. You should see an Unused Disk 0. Double-click it. Check SSD emulation and Discard if you are using SSD storage and want TRIM support. Click Add.
Now, make this newly added disk the primary boot device. Select the disk (it will likely be named scsi0 or virtio0) and click Edit. Check the Boot option in the advanced settings or adjust the boot order in the Options tab for the VM. Ensure the cloud image disk is the first boot device.
Next, add a cloud-init drive. This is a virtual CD-ROM that provides configuration data to the VM on first boot. Use the same storage as your disk.
TEMPLATE_VMID=911
STORAGE="local-zfs"

qm set "$TEMPLATE_VMID" --ide2 "$STORAGE:cloudinit"
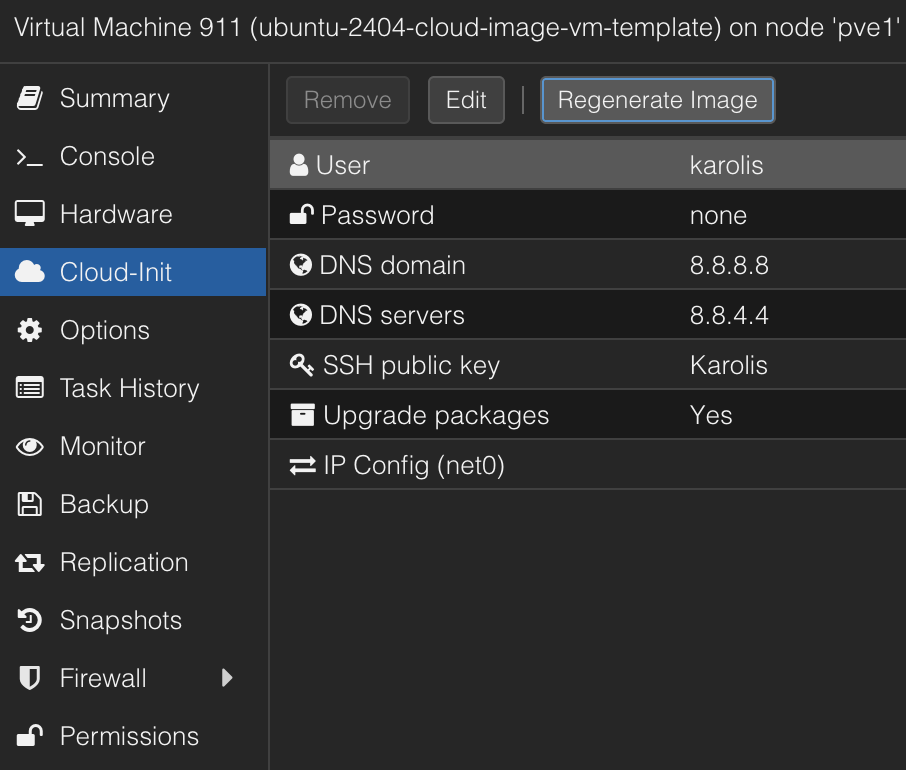
Navigate to the Cloud-Init tab for the template VM. Configure the default User, enter your SSH public key, and set DNS servers.
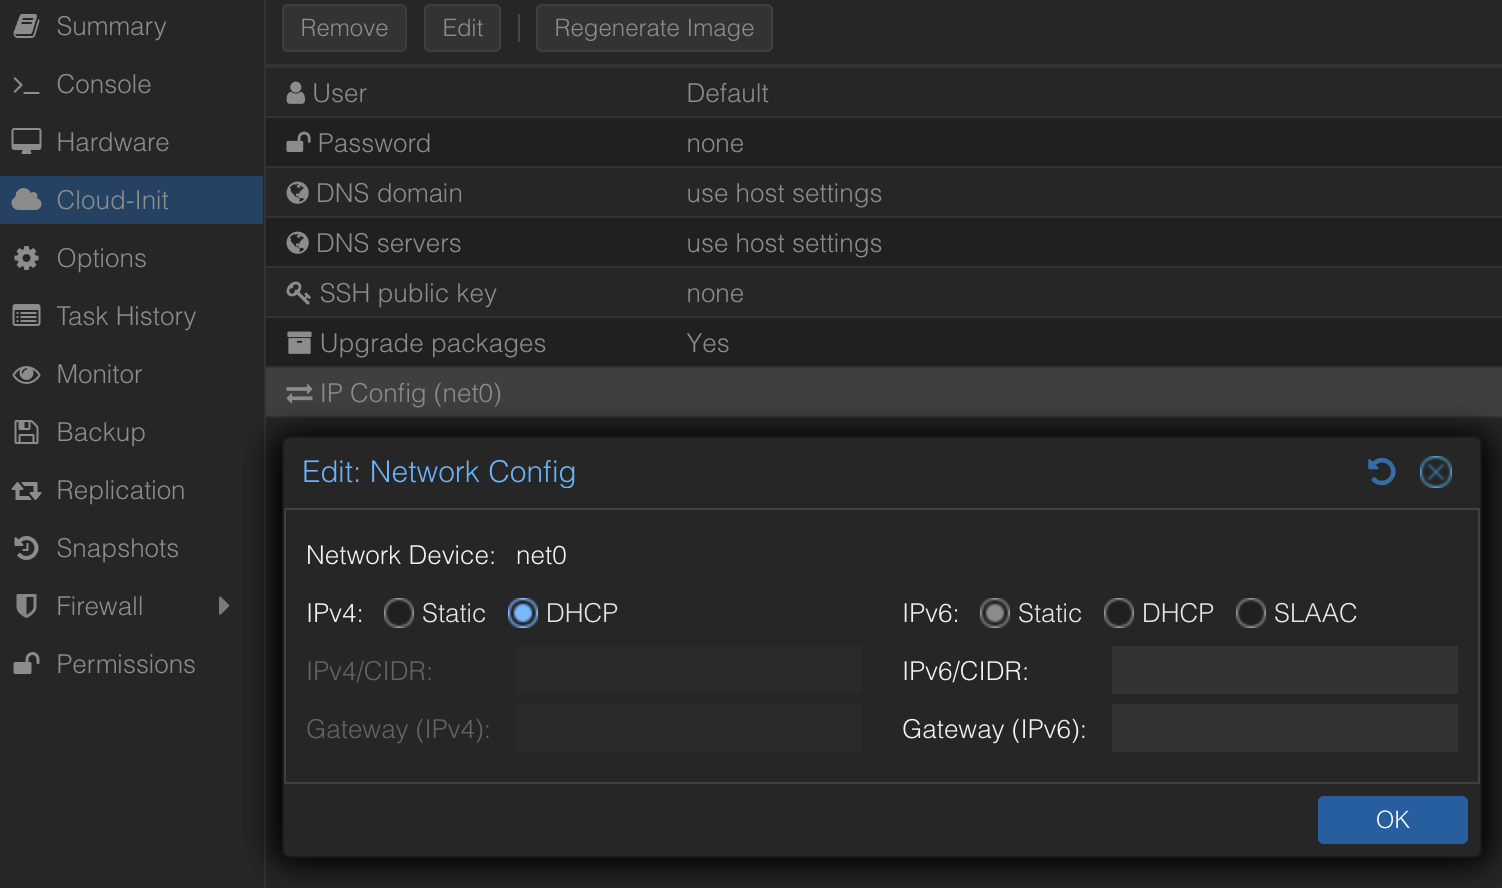
More importantly, configure the network options. By default, IPv4 might be set to static with no address. Change this to DHCP if that’s your intended setup. I don’t need a specific static IP initially, as Ansible will connect via DHCP assigned IP and then configure networking further (e.g., adding it to my Tailscale network), but that’s a story for another time.
Crucially, do not start the VM. Right-click the VM in the Proxmox sidebar and select Convert to template.
You now have a “golden sample” Ubuntu Noble LTS template, ready for cloning!
Spawning the VMs
Our template has modest resources (1 core, 2GB memory, ~2.4GB disk). When cloning, we’ll typically want to adjust these. Perform a Full Clone (unlinked clone) to create an independent copy. Specify a name and optionally override tags.
TEMPLATE_VMID=911
NEW_VMID=201
VM_NAME="vm-services"
CORES=8
MEMORY_MB=32768 # 32GB
TAGS="virtual-machine"

qm clone "$TEMPLATE_VMID" "$NEW_VMID" --name "$VM_NAME" --full
qm set "$NEW_VMID" --cores "$CORES" --memory "$MEMORY_MB"
qm set "$NEW_VMID" --tags "$TAGS"
Ensure the boot order is correct for the new VM (it should boot from the primary disk, now scsi0). This usually happens automatically with clones, but doesn’t hurt to verify or set explicitly.
NEW_VMID=201
qm set "$NEW_VMID" --boot order=scsi0
The disk size is still small. Let’s resize it. If using ZFS, first resize the ZFS volume (zvol) on the PVE host, then tell Proxmox about the new size.
NEW_VMID=201
DISK_SIZE_GB=30

# Assuming default ZFS pool 'rpool' and standard disk name format
ZVOL_PATH="rpool/data/vm-${NEW_VMID}-disk-0"
zfs set volsize=${DISK_SIZE_GB}G "$ZVOL_PATH"
qm resize "$NEW_VMID" scsi0 ${DISK_SIZE_GB}G
The underlying block device is larger, but the guest OS filesystem doesn’t know it yet. We can use virt-customize again, this time on the new VM’s disk, to resize the filesystem inside the guest.
First, identify the correct disk and partition inside the guest image. It’s usually /dev/sda and /dev/sda1 for the root partition in these cloud images. You can verify using virt-filesystems:
NEW_VMID=201
DISK_PATH="/dev/zvol/rpool/data/vm-${NEW_VMID}-disk-0"

virt-filesystems -a "$DISK_PATH" --long -h
# Expected output similar to:
# Name        Type        VFS   Label            Size  Parent
# /dev/sda1   filesystem  ext4  cloudimg-rootfs  ~2.4G -  <-- This is the one we need to grow
# /dev/sda15  filesystem  vfat  UEFI             104M  -
# ... other partitions if any ...
Now, run virt-customize to install tools needed for resizing and perform the resize operations. We need cloud-guest-utils for the growpart utility.
growpart /dev/sda 1: Tells the OS to expand partition1on disk/dev/sdato fill available space.resize2fs /dev/sda1: Resizes the ext4 filesystem on partition/dev/sda1to match the new partition size.
NEW_VMID=201
DISK_PATH="/dev/zvol/rpool/data/vm-${NEW_VMID}-disk-0"

virt-customize -a "$DISK_PATH" \
  --install cloud-guest-utils \
  --run-command 'growpart /dev/sda 1' \
  --run-command 'resize2fs /dev/sda1'
That’s it! We have our resized VM. Proceed to boot it. After a short wait while cloud-init runs, you should see the IP address appear in the Proxmox UI summary page for the VM (thanks to the qemu-guest-agent we installed).
Finally
For convenience, I’ve wrapped these cloning and resizing steps into a shell script. I asked Gemini to help convert the commands into a reusable script: vm_clone.sh (gist).
I’ve saved this script as /root/vm_clone.sh on my PVE node. Now I can clone, resize, and configure a new VM by running:
# change SOURCE_VMID="911" in the script to match your golden template
/root/vm_clone.sh <New_VMID> <VM_Name> <Cores> <MemoryMB> <DiskSizeGB> "<Tags>"
For example, to create the vm-services machine:
/root/vm_clone.sh 201 vm-services 8 32768 30 "virtual-machine"
And another one:
/root/vm_clone.sh 202 vm-another 4 8192 30 "virtual-machine"
At this point, I can pretty much immediately SSH into my fresh Ubuntu VM. It already has my defined user (karolis in my case) and my public key authorized via cloud-init, the disk is resized to 30GB, and the hostname is set correctly. Ready for provisioning!